This is a feature summary. If you would like to read the full text, click here.Creating a wildlife-friendly pond
When I moved to my current house, one of the most exciting features of the garden was a small, somewhat derelict, pond which had a good population of frogs. Unfortunately the pond was in the 'wrong' position and I soon developed ideas for creating a bigger and better one elsewhere in the garden. I use it here, by way of an example, to show how a garden pond can be created.
Positioning the pond
The 'ideal' position for a pond is one where it receives plenty of sun, clear from overhanging trees, on fairly level ground and not troubled by excessive runoff from elsewhere in the garden. Obviously it must also fit nicely with your overall garden design and not obstruct access to anywhere.
You would be very fortunate indeed to find the ideal position in the average garden. I had to compromise a bit on the slope (because the whole of my garden lies on a slight slope) and also on the proximity to trees. The trees do not shield the pond from the sun, but in autumn the falling leaves would create a problem that would have to be dealt with.
Pond profile design
 Profile of my semi-formal pond.
The pond profile which is best for wildlife is a short of shallow saucer shape with gently shelving sides. This allows animals to get into and, more importantly, out of the water easily. This sort of naturalistic design is not suitable for all garden settings. My own pond was designed in a more semi-formal tradition. To attain a sufficient depth without taking up too much space, I had to have steeper sides. However, I included a 'planting shelf' all the way round and incorporated a substantial gently shelving 'beach' at one end.
Pond construction
The easiest way to build a wildlife pond is to dig a hole and line it with a flexible, waterproof liner - the most important consideration is protecting the liner from punctures. When you've marked out the perimeter of your pond, leave it for at least a few days and gradually adjust the perimeter until you're sure it's right. Clear the ground and make sure it is level: you may have to build it up in some areas and lower it in others.
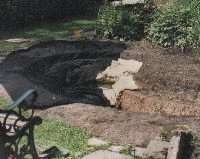
 Pond hole with liner underlay and cushioning (loft insulation) below that.
Dig the hole in good weather. Take your time and think carefully about where any planting 'shelves' and other levels are going - it's easy to take soil out, but not so easy to put it back! Remove any stones, roots and other sharp objects which could penetrate the liner. Before you put your liner into the hole, you should add some cushioning, like a layer of sand (sometimes old carpet or newspapers are recommended), to provide extra protection for the liner.
The liner must be quite a bit bigger than the size of the hole in order to allow it to mould into the contours of the hole. Stretch it over the pond, push it in and start filling it with water. As the pond fills, ensure that the liner is neatly folded to the contours of the hole. Never trim the liner until the pond is full in order to ensure that you do not trim too much liner off. You will need to leave about 40cm overlap around the pond. Lay about 20cm of the overlap over the ground and bury the remainder well.
Edge construction
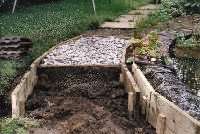
 The pond edge construction slate, gravel boards and narrow planting gap.
The way you design the pond edge has a critical influence on how the pond looks and 'feels'. A naturalistic design calls for planting right up to the water's edge. You can achieve this by laying turfs over the exposed edge of the liner. If you want to plant into these, lay the turfs upside-down; the grass on the underside will bind the soil together until the planting has taken over. Note however, that neither of these options is a low-maintenance one: the vegetation/grass will need to be kept in check to prevent it from invading the pond.
For my semi-formal design, I covered the exposed liner with some old roofing tiles and laid a path around one side of the pond. For the path I used loose slate chippings bounded with gravel boards. I created a narrow (5cm) planting gap between the path and the edge of the pond in order to soften the edges. While I still have some planting near the pond edge, it is a lower maintenance option that the full naturalistic design.
Substrates
Wildlife will benefit most from your pond if it contains a number of substrates, e.g. rocks, stones, gravel, mud, logs. Be careful what you lay on your pond liner. It is a good idea to put something protective between large rocks and stones and the liner (e.g. some scraps of pond liner underlay). Use stones etc to create a gently shelving 'beach' area in the pond where animals can easily crawl out.
Many invertebrates require mud and if you can get some from an established pond, that will kick-start the ecology of your pond. Don't use fertile garden soil in the pond - the nutrients will probably cause an explosion of algae. If you can't get any from another pond, you can buy special pond soil from garden centres.
Planting
Pond plants are often divided in several categories.
- Submerged oxygenators: these plants play an important role in oxygenating the water. They are often not rooted. You should throw a few bunches of these in as soon as possible - they will soon proliferate. Hornwort is an un-rooted submerged oxygenator.
- Free-floating plants: these are not rooted and float on the surface of the pond. Duckweed is an example of this kind of plant.
- Aquatic plants: these are rooted at the bottom of the pond but send up leaves and flowers which float on the surface. Water lilies are well known examples.
- Emergent plants: these are normally rooted between 15 and 60cm in depth but grow clear of the surface of the pond. Reedmace (used to be called Bulrush) is a good example.
- Marginal plants: these are similar in habit to emergents, but they are normally rooted in shallower water, between 0 and 15cm deep. Marsh marigold is an emergent.
If you have a naturalistic pond, you can plant straight into the substate. If, like me, you have not completely covered the pond liner with a substrate, you can use special pond planting crates. The advantage of these is that you can move the plants around on your planting shelves as you see fit.
Child safety
Safety should be considered when you design your pond. If there is any possibility that small children could come into contact without adequate supervision, then you should take measures to protect them from accidents.
The naturalistic pond design, because of its shallower and gently shelving sides, is one of the safer designs. In ponds with steeper sides, you can either cover the pond in some sort of child-proof mesh, or somehow fence it off from the rest of the garden. I have planted a low hedge around my pond to restrict access: I will be able to completely close it off from the rest of the garden by means of a couple of gates.
Unless you are completely confident in a child's understanding of the dangers then he or she should not be left unsupervised in a garden with a pond; even one which incorporates extra safety measures. By supervising children as they marvel at the wonders contained in a pond and, at the same time, teaching them about the dangers of water, they will learn to respect it without fearing it.
| First published May 2003. Last revised January 2004. |
|
Copyright Richard Burkmar 2003. Permission is hereby granted for anyone to use this article for non-commercial purposes which are of benefit to the natural environment as long the original author is credited. School pupils, students, teachers and educators are invited to use the article freely. Use for commercial purposes is prohibited unless permission is obtained from the copyright holder. |
This is a feature summary. If you would like to read the full text, click here.